Friday, September 30, 2011

Patio After

Back in August I posted about repainting our concrete patio and I promised some "after" photos. And here they be. I'm looking forward to the day when I can casually drop a few hundred dollars on a new patio set, outdoor rugs, plants and all the lovely things I have in my head. But right now I'm finding thrifty ways to create a space we love. (My apologies for the dark photos - one nice thing about our patio is that it's always shady, but that doesn't lead to great photos).


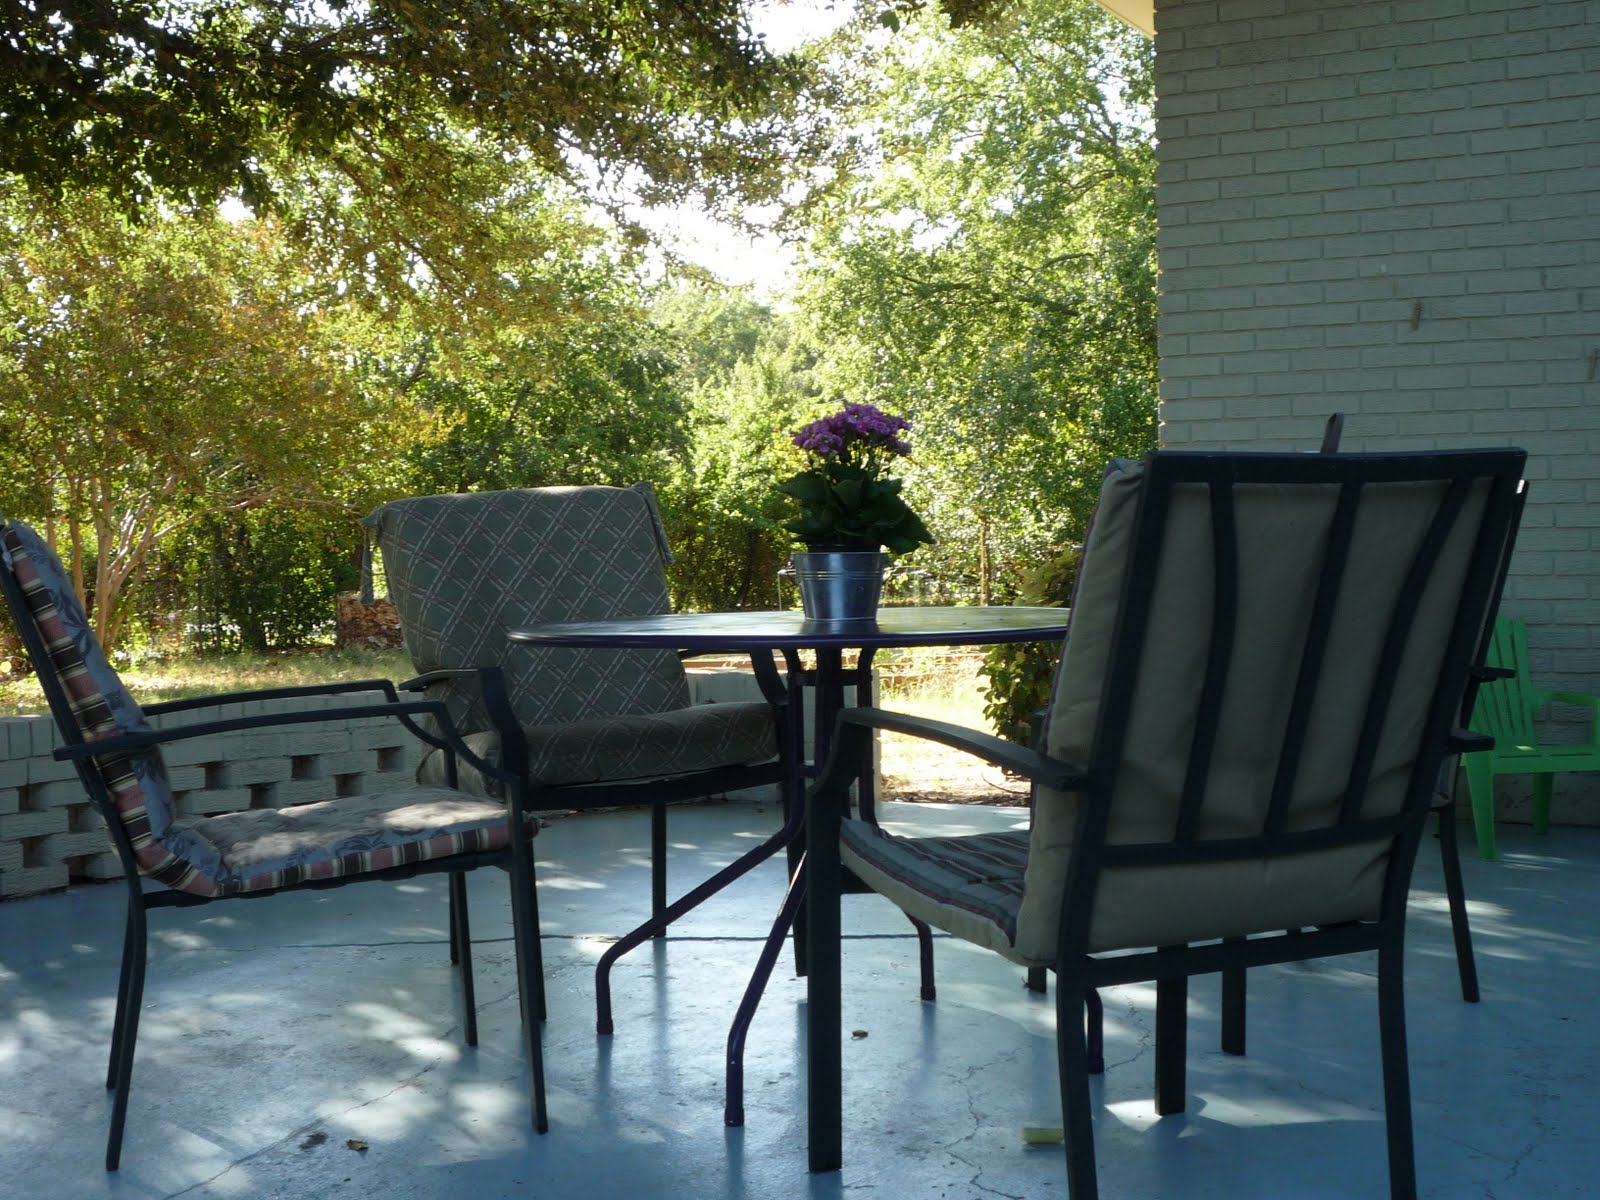
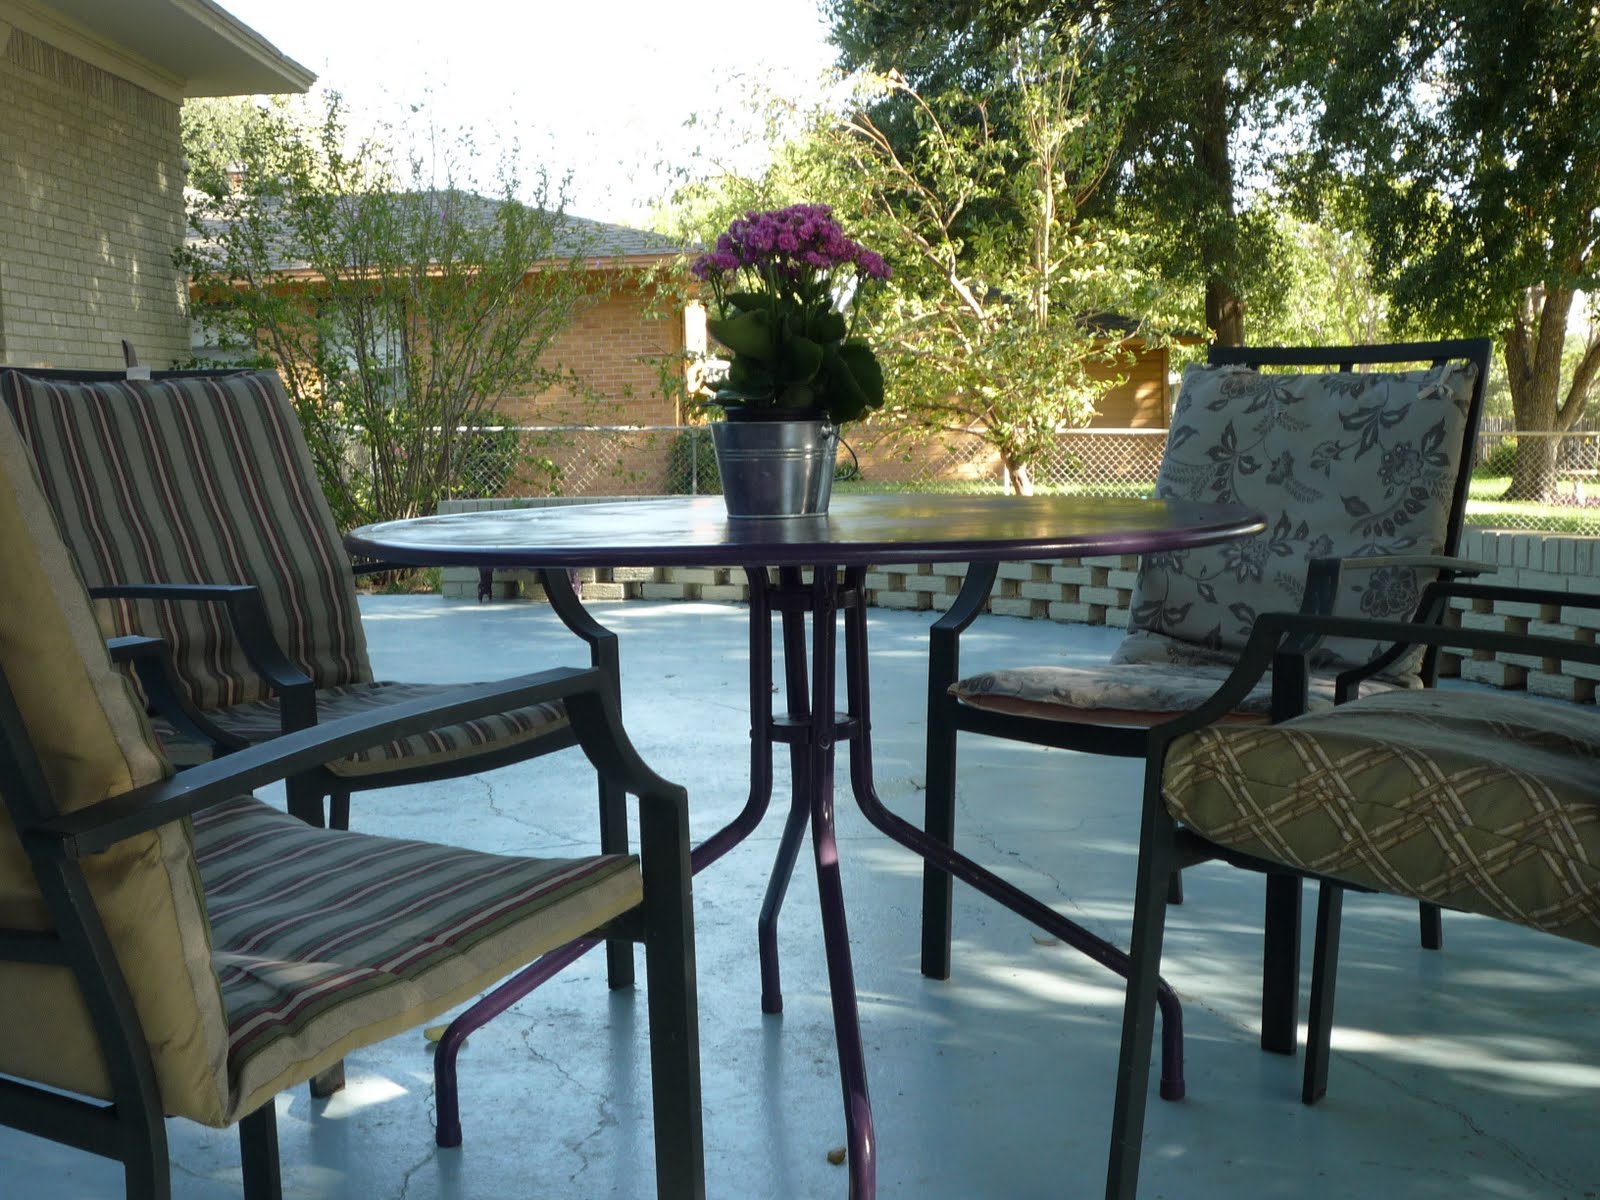
The patio table was purchased from a neighbor's garage sale for $2. We spent about $9 on spray paint, first priming it gray, then adding a couple of top coats in purple. The chairs were headed for the dump. The squirrels had been after the stuffing in the original cushions and my dad was sick of it. He finally gave up and was carting them to the dump when I intervened. I used some fabric given to me from my mom and mother-in-law's stash to recover two of them, and two had been neglected by the squirrels and stayed as-is. The pretty silver bucket is from the paint department at Home Depot (about $4) and the kalanchoe is from Kroger ($6).


This little corner is Hugh and Rosemary's space. Their stuff only stays in this area for photos though - normally it's all over the patio and yard. The plastic kitchen it really ugly, but they love it. I'm thinking of trying some of Krylon's Fusion line of spray paint to do a little make-over.

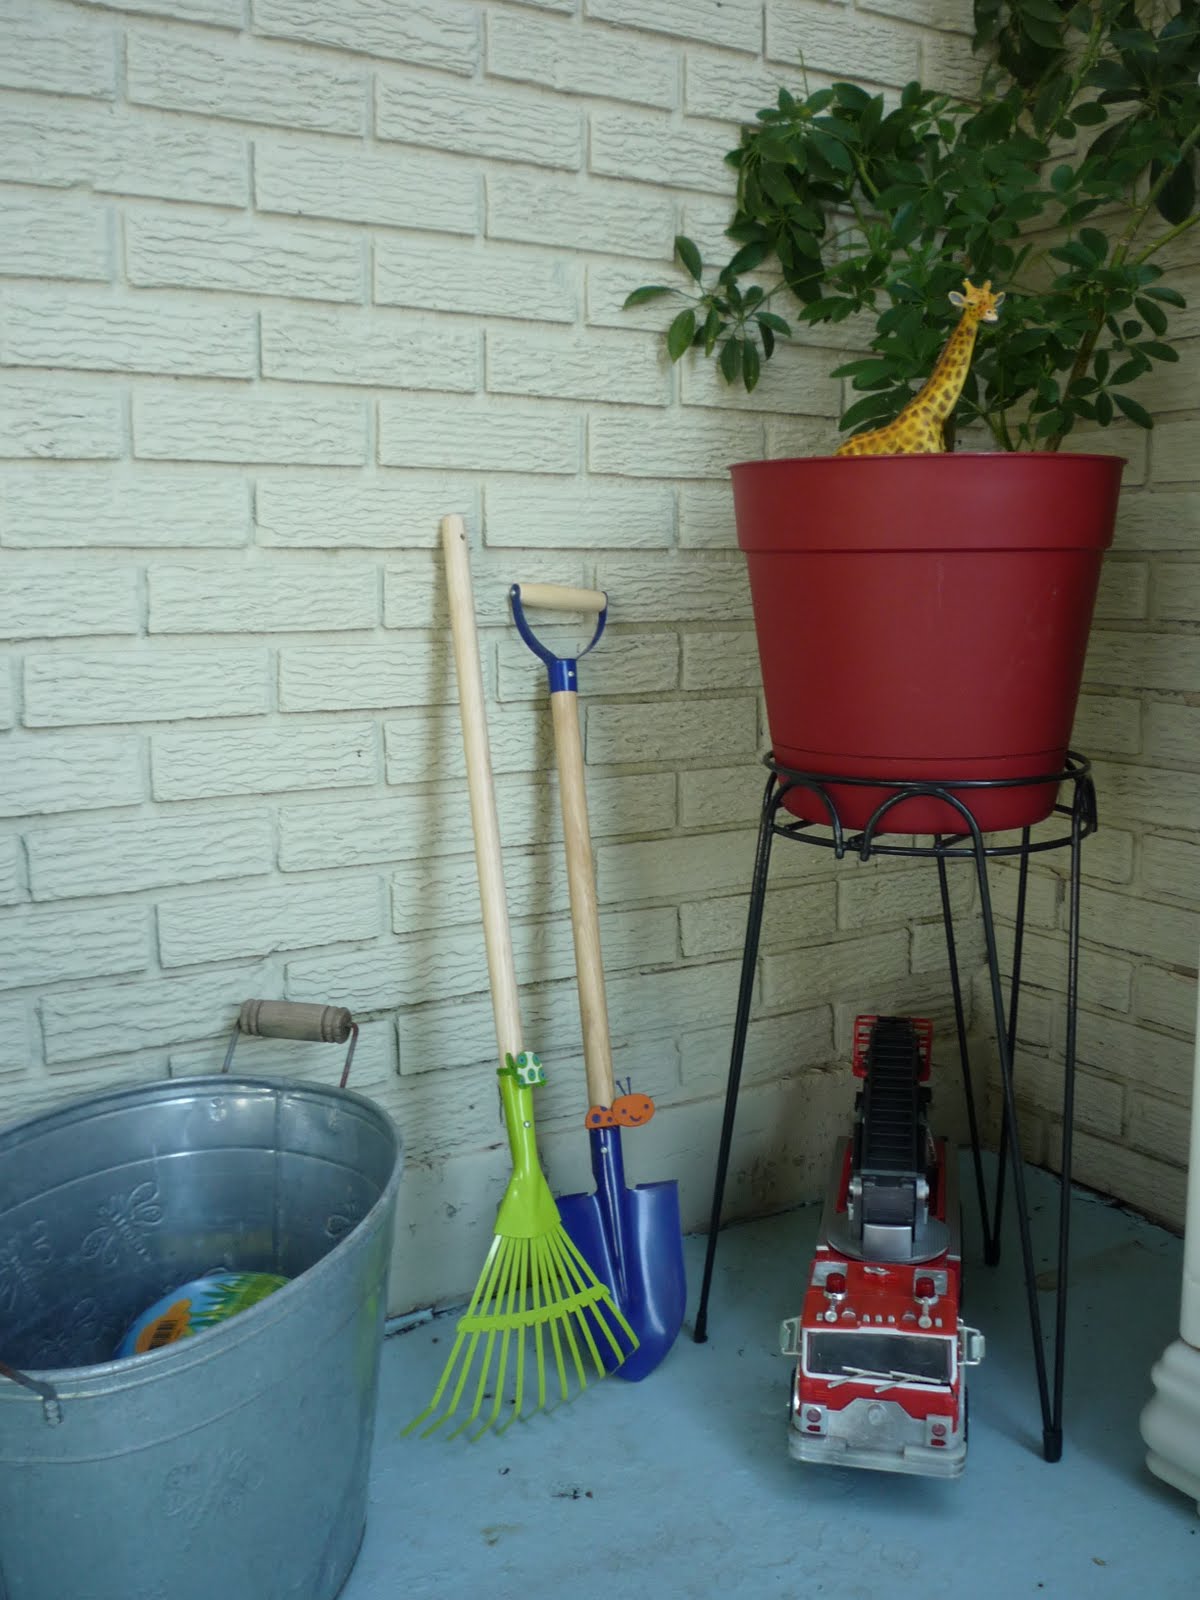
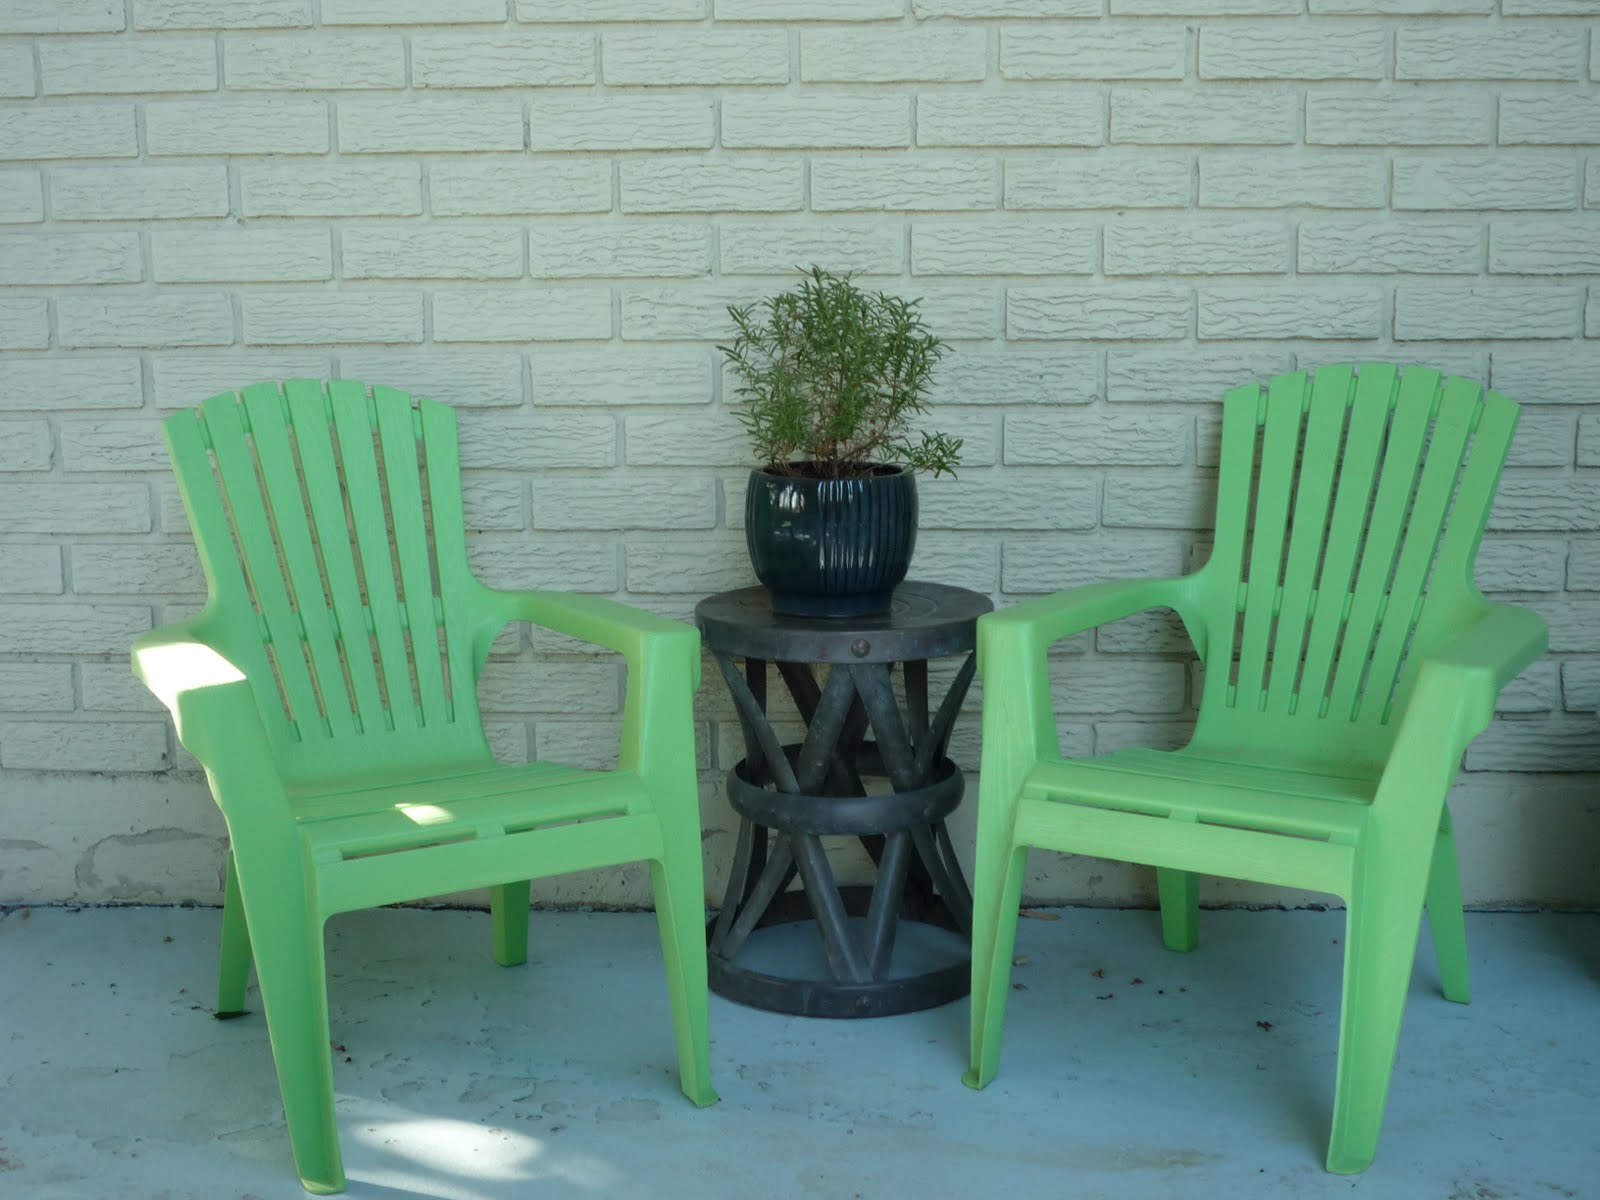
The little chairs are from Ace Hardware last summer ($5 each) and I LOVE this little brass table (thrifted, $4). Hugh likes to eat leaves from the potted Rosemary plant. The cute kid-size rake and spade are from an end-of-summer clearance at Joanne Fabrics (about $3 each). So far the kids haven't hit each other with them.


This full-of-potential patio love-seat was $10 at a garage sale. I'm just waiting to find some gently used patio cushions to recover and make it usable. The grill? FREE! I was driving through our neighborhood last week and this was on the curb with a "free" sign. But was free good enough? No! I knocked on the door and asked if the nice gentlemen there would help me get it into my car. They went above and beyond and actually drove it to my house in their truck! Turns out the grill is in great shape - it just needed a good cleaning. We'll have to invite our neighbors over for dinner some night to thank them.


Taking these "after" photos was a great excuse to clean things up a bit. After writing this post, I realize that we spent well under $150 for everything here (including the patio paint and $7 easel for the kids). I usually don't set out with a budget in mind for these projects. They just come together a little at a time. And this is definitely still a work in progress, but I'm happy with our little space so far.

Monday, September 26, 2011

Oliver + S Penguin Backpack

I'm so proud of this one! Don't you love it when you try something new - something a little challenging - and you manage to pull it off beautifully? Not that there weren't mistakes made along the way (the seam ripper is my friend), but I just love the way this one turned out. The pattern is from a library book I checked out recently: Oliver + S Little Things to Sew.

(ta-da!)


This book is wonderful! I wish that all commercial patterns were this well made and easy to follow. The patterns in this book range from really fairly easy patterns that would be perfect for beginners, to patterns like the backpack, which are a bit more challenging (zipper, lining, interior pockets) but still totally accessible to someone new to sewing.

(interior lining)


But on to the backpack... the photos in the book showed a fairly subdued penguin in dark blue. I decided to use a brighter blue, and a brighter yellow for the beak and feet.

One of my favorite parts is the little hand-stamped label I made with Hugh's name.

(note the adorable bunny butt stamp)

Hugh is not nearly as enthusiastic as I am. I had to bribe him with chocolate to wear it for these photos.

(here he is looking at the wall, where I lied and said there was a bug)

If you're interested in the hand-stamped clothing labels, there is a great little tutorial here. I had a hard time finding the Versacraft fabric ink pad at any of the local chain craft/fabric stores, and ended up getting it from Overstock. You never know when they'll run out of something, but it would be worth looking there first - it was the least expensive place I found it on-line. I loved the author's sources for stamps and fancy twill tape, but I just used plain twill tape from Jo-Anne Fabrics, and some stamps that my dear friend gave me years ago. Please let me know if you have any questions, and thanks for letting me share my backpack project!

Oh, and here's an extra photo of Hugh sporting a new shirt I made for him and a little sneak peek of some new pants I made for him. More on those soon!

Tuesday, September 20, 2011

my little superheroes

Rosemary, ask "Mrs. Incredible". Photo by Robyn Brumfield.

Hugh, aka "Captain America". Photo by Robyn Brumfield.

Just had to share a couple of photos of the kids in their superhero duds. Rosemary actually had a really complicated request... she wanted to be Elastigirl from the Incredibles. Not Mrs. Incredible, but the Elastigirl as shown in the first part of the movie - before she gets married and she's wearing some kind of green and white outfit, "with red boots". But we had to settle for the Incredibles logo on a pink shirt. I still think it turned out well, and Rosemary wears it at least once a week.

And Hugh takes the prize for the sweetest Captain America ever. Can you see how this guy gets away with just about anything?

Thursday, September 15, 2011

Captain America

I don't know if it's through sheer determination, or exposure, or genetic predisposition, but my kids LOVE superheros. LOVE. My husband does too, and sharing this this with the kids is one of his greatest joys.

So for Brian's recent birthday, I made him his own Captain America shirt.

(Brian's shirt)


And once Hugh saw me making it, he had to have one too.

(Hugh's shirt)

For Brian's shirt I used a plain blue shirt he already had, but for Hugh I had to make a shirt that would work. Brian actually likes Hugh's shirt the best, and he thinks the contrasting red trim and envelope neckline make it look more like a something a superhero would wear. All the better.

I love these knit appliques, because they're nice and soft and as you wash them, the edges curl up a bit, giving the shirt a nice texture and kind of broken-in look.

Now I just need a photo of my two handsome guys together.

Coming soon: Rosemary's superhero shirt!

Tuesday, September 13, 2011

Giving up the Bottle

Until fairly recently, Hugh was still taking a bottle at naptime and bedtime. This is kind of embarrassing to admit, since most pediatricians and child care-type people recommend (rather firmly) giving up bottles around one year. For us though, this was hard to give up. We did sleep training with Hugh as a baby and he has really been a champ from early on - sleeping from 6PM to around 6AM for the longest time. And why rock the boat? Whenever he was ready to go to sleep, all we had to do was sit in the dark with him for a few minutes, then put him down with his blanket (Bubuh) and a bottle and he went happily to sleep. He chewed up nipple after nipple though (bottles, not mine) and finally around his second birthday we threw the last one away. We switched to the Munchin brand sippy cup with a silicone top, which is pretty much as close as you can get to a bottle. We've probably bought between six and eight of these, and he has destroyed the tops, one by one. Finally, this past week, the final "bottle" was starting to show some wear and we started talking to him about it... letting him know that when this one fell apart, there would be no more bottles.

(Hugh with Bubuh and "bottle", on our way home from the beach.)


Then it happened. The top was hanging off and it became a choking hazard. For one day we let him carry around the topless cup and complain. Then I tossed it. At first we tried giving him a normal (Playtex) sippy cup of milk at bedtime and naptime, but then I realized that this was nuts. He's rejecting milk in any form other than the bottle, so why struggle to get him to take milk in bed? He's pissed off anyway, so let's just go ahead and deal with both issues at once: getting rid of "bottle" and stopping bedtime milk. So now we're offering milk during the day in a sippy cup or big kid cup and just letting him have a cup of water to take to bed. It's been a rough transition, but not as bad as I anticipated. Night before last was bad... lots of crying and some waking during the night. His nap yesterday was the worst... pretty much crying for about 35-40 minutes solid. There was no comforting him (though I tried). Last night though... so easy! We read stories with Rosemary, then brushed teeth, then read one more story in his room while he sipped on some water, then went to bed. He talked to himself quietly for about 30 minutes, then went to sleep. And SLEPT ALL NIGHT!! Yes! Today at naptime he fussed for about 15 minutes and then went to sleep.

As I type this, I realize that it's most likely intensely boring for anyone who doesn't have a toddler. Most parents don't talk much about this stuff because it's dull and it makes us look kind of inadequate as parents. Or at least I feel that way. But for the handful of friends who might like to know they're not alone in any rough transition for their kids, I write this. I'm learning that doing my best is good enough. I love my children and strive to make the best decisions for them, and for our family and myself, as I can manage every day. I'm learning that comparing myself to other parents isn't helpful for anyone. And that in the rear view mirror someday these struggles might seem really small. But right now, helping my kids grow and become more independent is huge. It's what I do. At this moment, it's the most important job I have.

Tuesday, September 6, 2011

long sleeve upcycled shirts for the boy

A while back I discovered the amazing site, Made (aka Dana Made It). Dana makes incredible clothes for her kids and she has a real knack for writing simple to follow instructions, detailing the steps involved. And photos. Lots of photos. And since I'm mostly a visual girl, that's a huge help. I fell in love with her 90-Minute Shirt and had to try it. This was my first attempt at creating my own pattern and the first try was unwearable. I tried cutting off the sleeves, but the arms were still too small. But I learned and kept at it and finally came up with a pattern that works well for Hugh. This involved a LOT of trial and error and making and remaking patterns based on an old cut-up onsie and t-shirts that currently fit him. Since then I've had a lot of fun with this. The basic idea is that you take a large or XL men's shirt and cut it up into four main pattern pieces: front, back and two arms. The trim is created from strips of knit fabric, either from another t-shirt or some purchased rib knit.

The beauty of this project is all in the design and the freedom of working with existing shirts. A large or XL men's shirt has plenty of fabric and there is something really liberating about cutting into something that no one wants. I've found some great designs and had a lot of fun deciding the layout of the new boy's shirt... you can do anything! You're not limited to putting the design on the front of the shirt... you can place it on the back, off-center, even on the arms. And I like that I can make shirts for Hugh that are more colorful and less "BOY" (ie, footballs and trucks and whatnot) than I might see at the store.

More to come soon, but here are some photos of what I've done so far:


The photos are in the order, from top to bottom, that they were made. I didn't include the one that didn't work at all, but you can see that the first two shirts are a little wonky on the neckline - one side of the envelope neckline comes down further onto the arm seam than the other. But by the time I got to the "luck" shirt on the bottom I had the process figured out.

Recently I've been working on more knit projects - more to come soon!

Monday, August 29, 2011

Beauty

Sometimes a moment just takes over and I'm learning to let it. A moment of joy or awe or just giddiness that makes me feel all over-the-top vital and alive. I think for me, wisdom means rediscovering that connection to something bigger... not thinking about things, and pondering meanings, but just being fully in the moment and in my body and letting it all wash over me. I don't have a photo of this, but my kids remind me what it looks like every day.